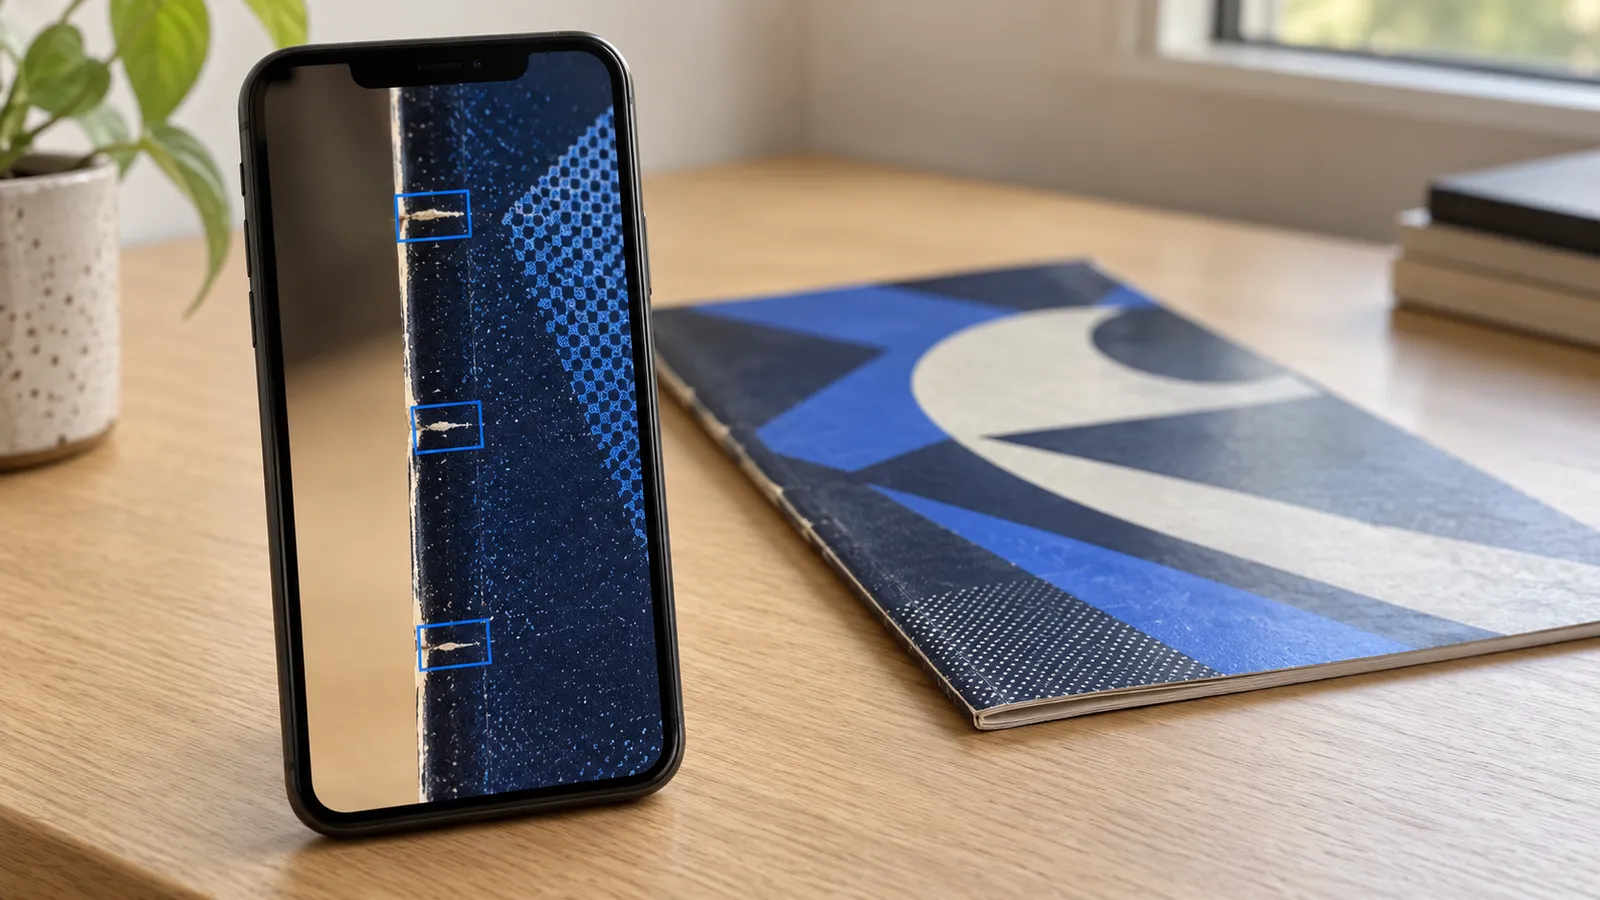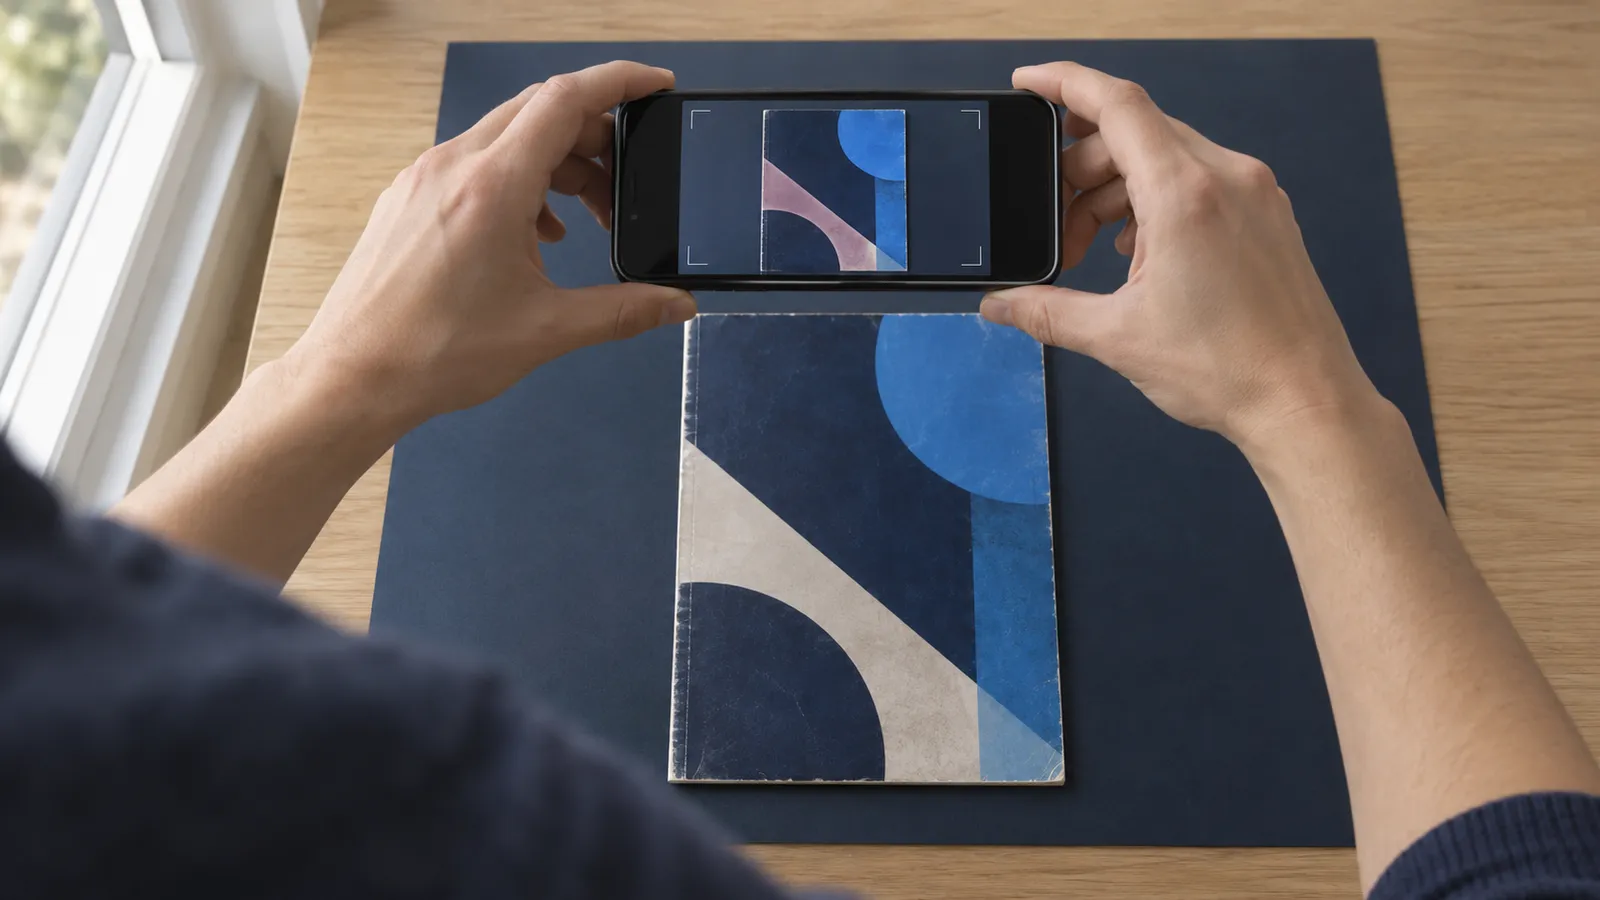
To photograph comics for grading, lay the book flat on a dark, non-glossy surface, turn off the flash, and light it from one side. Hold the phone level above the book with all four edges in frame. Shoot both covers, four corner close-ups, and the centerfold staples, then record a slow spine pass and a page flip. Keep every original unedited.
Why ordinary photos hide the defects that set a grade
A comic's grade follows its worst defect, not its best feature. One 1/4 inch crease that breaks the color, or a row of small ticks along the spine, can hold an otherwise sharp copy well down the scale. What VF, FN and NM actually mean explains each step.
A crease that has not broken the ink still counts, but it changes the shape of the paper, not its color, so it shows only when light strikes it at an angle. A photo in flat, even light records the ink and misses the shape.
The same book, shot two ways
Picture an example book (illustrative, not a real report) with a dark cover, a 1/2 inch crease near one corner that does not break the color, and a few spine ticks.
Shot one is a typical listing photo: glossy countertop, ceiling light, flash on, phone tilted to dodge its own shadow. A white oval of glare fills the middle of the cover, and the flat light erases the crease. The ticks are a few pixels each, one edge falls outside the frame, and a warm filter makes the colors pop.
Shot two uses the same phone: a dark cloth, a lamp low on one side, no flash, and the phone level above the book with a thin margin on every edge. The crease shows as a fine bright line where the lamp catches one side of the fold, and in the spine video the ticks flash white one after another. The colors look duller than in shot one, and that is correct.
Set up your space before you shoot
- Surface. Use a dark, non-glossy surface, such as a dark cloth on a table. Glossy stone and glass throw reflections, and busy patterns hide the cover edges.
- Light. If you have a lamp, set it low and off to one side. A bright ceiling light overhead tends to put a glare spot on glossy covers.
- Flash. Turn the phone flash off.
- Hands. Wash and dry your hands, and take off rings and your watch. Handle the book by its edges and keep your fingertips off the cover.
- Lens. Wipe the phone lens. A smudge softens every shot and looks like a focus problem.
The full capture set and what each shot is for
A complete set is seven photos and two short videos, the same set NuGrade's guided capture walks you through. Hold the phone level and tap the book to focus before each photo.
Front cover
Shoot from straight above, with all four corners in frame and a little space around them. This is the whole-cover view: creases, color breaks, abrasion, soiling, fading, writing, and gloss. It also shows whether the cover sits square on the pages.
Back cover
Use the same framing. Back covers collect shelf rub and handling marks that a front-cover photo cannot show. Two public sample reports record back-cover findings: a small dark mark at the left edge on E-Man #1, and small nicks along the spine-side edge on Green Lantern #59.
Four corner close-ups
Hold the phone 3 to 4 inches from each front-cover corner tip, with the tip centered and both adjoining edges in frame, and tap the tip to focus. These photos show blunting, small creases, and white flecks where ink has worn through to paper. On the Guardians of the Galaxy #4 report, the top-right close-up shows a short crease at the tip with color break.
Centerfold staple seam
Open to the exact middle and turn the book so the seam runs top to bottom in the frame. Move close enough that both staples and a little page on either side fill the shot. This photo shows rust and tears at the staple slits, and whether the centerfold is secure. It is too tight for page color, which the flip video covers.
Slow spine pass video
Lay the book flat, front cover up, with the flash off. Hold the phone level and close, and record one slow pass from the top edge to the bottom edge; 10 to 15 seconds is a good pace. This video is the main evidence for spine ticks, stress lines, and color breaks along the spine and at the staples.
Page flip-through video
Start on the closed front cover, flat on the table, and hold until the image is sharp. Turn one page at a time, pause about two seconds after each turn with both pages in frame, and end on the closed back cover. Do not fan back through pages you have already turned.
This video shows page tone across the whole book, plus interior tears, missing pieces, coupon cuts, writing, and stains. A complete, steady flip also lets a viewer count the pages.
Why moving light shows creases, dents, and gloss changes
A flat photo freezes one angle between the light, the cover, and the lens. Many defects show only at some angles.
- Creases. The two faces of a fold tilt different ways. Under low side light, one face catches the light and the other falls into shadow, so the crease reads as a thin line that appears, sharpens, and fades as the angle changes.
- Dents and dimples. A dent shows as a small pool of shadow, or as a kink in a reflection that slides across the cover.
- Gloss changes. Worn spots, finger oils, and some retouching reflect light differently from the original gloss. As a highlight travels across the cover, an area that stays dull, or stays bright, stands out.
- Spine ticks. On a glossy or dark cover, a tick may flash for only a moment as the highlight crosses it. A real tick appears in several neighboring video frames, and a stray reflection appears in only one.
That is why the videos carry so much weight: as the phone moves, they record one surface under many angles. On the Guardians #4 report, the spine ticks that set the grade persisted across adjacent frames of the spine pass, and several showed white color break against the black cover.
For extra photos, keep the book flat and move the lamp, or give the book a quarter turn on the table. A crease that runs toward the light barely shows until you turn it. Never bend or flex the book to make a defect show.
Capture problems that hide defects, and how to fix them
| Problem | What it hides | Fix |
|---|---|---|
| Glare and hot spots | Any crease, abrasion, or color break under the white patch | Move the lamp to one side, or shift the phone until the patch leaves the cover |
| Phone flash | Surface relief, so creases and dents vanish, plus a hot spot on gloss | Turn the flash off and light the book from one side |
| Blur from shake or missed focus | Fine ticks, slight corner blunting, and small chips | Tap the book to focus, brace your elbows, and retake if edges look soft |
| Framing from too far away | Small defects, which fall below what the photo can resolve | Fill the frame with a thin margin, and move closer for corners instead of using digital zoom |
| Cropped edges | Edge chips, nicks, corner wear, and the cover alignment that can reveal trimming | Keep all four corners in frame with a little space around them |
| Shooting at an angle | Proportion and squareness | Hold the phone level and parallel to the book |
| Color cast | True page color: warm light makes white pages look cream, and cool light makes tan pages look lighter | Use one light source, and if page color matters, set a plain white index card beside the open book (not on the page) as a reference |
| Shadow from your hand or phone | Surface wear under a dark band that can pass for soiling | Light the book from the side, not from behind you, and keep hands out of frame |
| Compression and filters | Fine surface texture and true color | Shoot in the standard photo mode with filters off, and send original files |
Before you send anything, zoom in on every photo and retake any shot with a soft edge or a glare patch.
Keep your original photos untouched
Send the photos and videos exactly as the camera recorded them: no filters, no beauty or portrait modes, no auto-enhance, no brightness or contrast edits, and no crops into the edges. If a shot looks wrong, retake it instead of fixing it.
Each edit changes the evidence:
- Smoothing filters and beauty modes erase surface texture. Printed ink has a fine, even grain, while paint and marker lie flat and smooth, and a grader compares the two to spot color touch. A filter can hide retouching, or make clean print look retouched.
- Sharpening draws false edges that can read as ticks or chips.
- Auto-enhance and color edits shift page tone, so tan pages can pass for cream.
- Tight crops remove the edges, where chips and corner wear sit, and the margins that show whether the cover sits square.
Keep the original files after you share them. Many messaging apps compress photos, so send original files when a buyer or grader asks. Buyers and graders cannot hold your book, so the photos are their only view of it. A buyer who finds a defect that an edit hid has a reason to return the book and to doubt your next listing.
Even perfect originals have limits: a photo cannot record odor or how brittle paper feels, and skilled restoration can be invisible. What AI can and cannot see in comic photos sorts out which is which.
A pre-shoot and capture checklist
Copy this into your notes and use it for each book.
BEFORE YOU SHOOT
[ ] Dark, non-glossy surface (a dark cloth works)
[ ] One lamp, low and off to one side, if you have one
[ ] Phone flash off; no ceiling glare on the cover
[ ] Hands washed and dry; rings and watch off
[ ] Phone lens wiped clean
[ ] Standard photo mode: filters, beauty and enhance modes off

PHOTOS (phone level, straight above, tap to focus)
[ ] Front cover: all four corners in frame, small margin
[ ] Back cover: same framing
[ ] Four front-cover corners: 3 to 4 inches from each tip
[ ] Centerfold: seam top to bottom, both staples in frame

VIDEOS (flash off, phone steady)
[ ] Spine: book flat, one slow pass from top edge to bottom edge
[ ] Page flip: closed front cover first, one page at a time,
    pause about 2 seconds per spread, end on the closed back cover

BEFORE YOU SEND
[ ] Zoom in on every photo: edges sharp, no glare patch, no shadow
[ ] No fingers in any frame
[ ] Originals kept: nothing filtered, edited, or cropped
Once you have a clean set, how to grade a raw comic at home shows how to read it defect by defect.
Frequently asked questions
Should you use the flash to photograph a comic?
No. A phone flash fires straight at the cover, which puts a bright spot on glossy ink and flattens the surface so creases and dents disappear. Turn the flash off and light the book from one side with a lamp.
What background should you use to photograph comics?
Use a dark, non-glossy surface, such as a dark cloth on a table. It gives the cover edges clear contrast so chips and corner wear stand out, and it does not throw reflections the way glossy stone or glass does.
How close should corner photos be for grading?
Hold the phone about 3 to 4 inches from the corner tip, with the tip centered and both adjoining edges in frame. Tap the tip to focus, then zoom in on the result and retake it if the tip looks soft.
Can you edit or crop comic photos before sending them for grading?
You should not. Crops that cut into the edges hide chips and wear, and filters or edits change the texture and color a grader reads. If a photo looks wrong, retake it and keep the original file.
Do you need special equipment to photograph comics for grading?
No. A phone is enough for the full set of seven photos and two short videos, and one ordinary lamp set low to one side helps show spine wear.